Home Theater: Screen Build
I have a few projects coming up that I hope to start blogging about, but to kick the series off I am going to document an older build (~5 years old). I have always wanted a “proper” home theater with a decent projector, nice screen, and immersive sound. That has, of course, taken a back seat to so many other priorities but I at least I have a screen to show for it.
The Design
I went for something I thought was straight forward: a wood frame and cloth screen. What I ended up with was something that was probably over-engineered/overkill for my use case but something I am happy with either way. It started with a couple drawings in my project notebook with an emphasis on preventing any sagging in the screen over time. The screen had to be supported from the sides due to a double-wide window being located behind the screen.
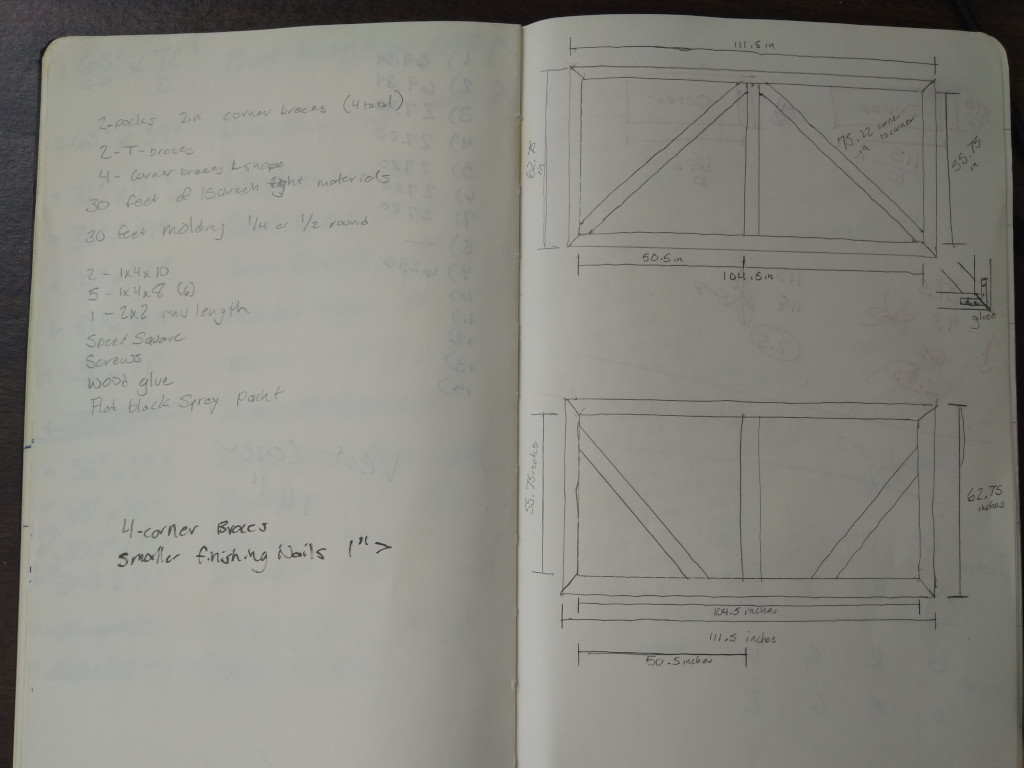
I decided on a 128" screen early on, mostly because the projector I was looking at supported the size and it looked like it would fill the wall well. All in, it probably cost around $250 to build, including all the extra hardware bits I could probably do without.
Construction
Note: Image quality will be varied as I did not have the best came ra at the time of building. There will also be missing build steps as the thought behind the pictures at the time was for myself and not really for a blog/presentation.
Construction was fairly straight forward. Lots of measuring, cutting, adjusting, and screwing. General parts list as follows:
- Plenty of 1x4 common boards
- Perimeter’s worth of Quarter Round
- 1/2 in wood screws
- 4 x Corner Brackets
- 2 x T-Brackets
- 4 x Corner Bracket (inside supports)
- Enough screen door mounting material to hold the screen.
- Silver/Grey Milliskin Spandex
- White Milliskin Spandex
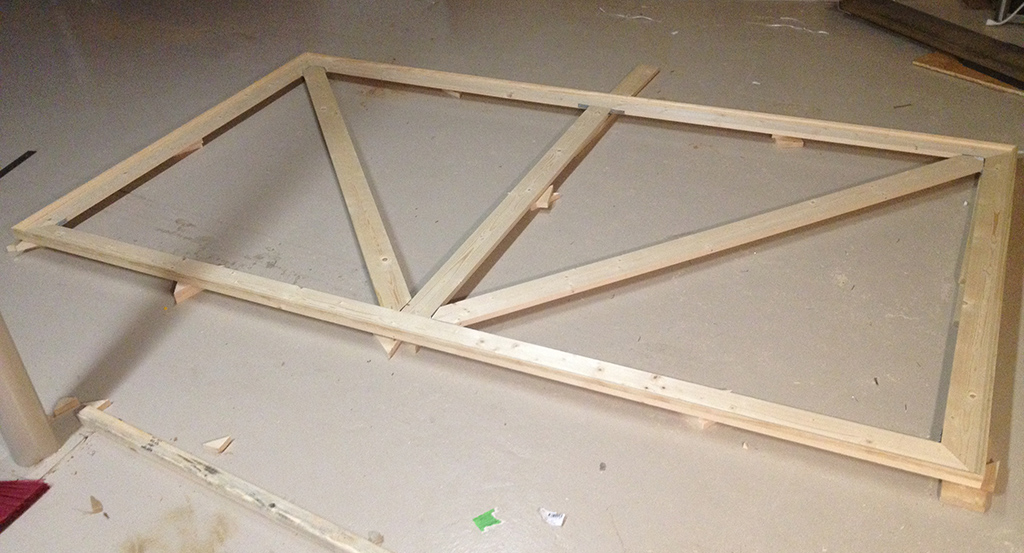
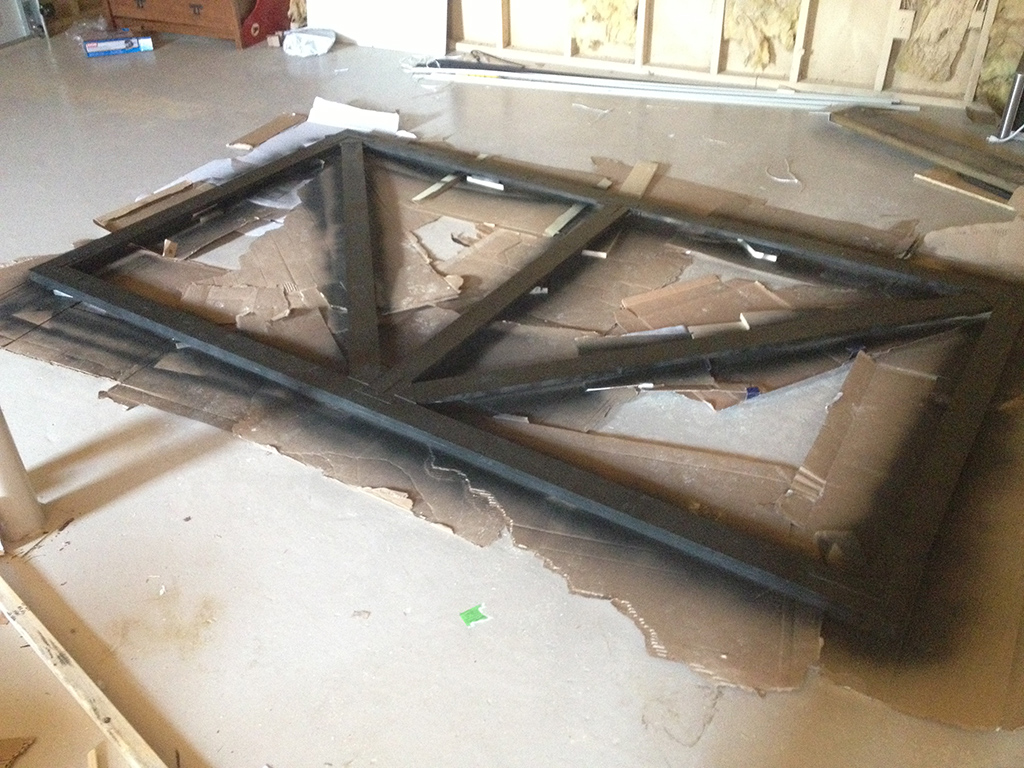
Here you can see the generally complete frame (sorry, don’t have too many pictures from this far back).
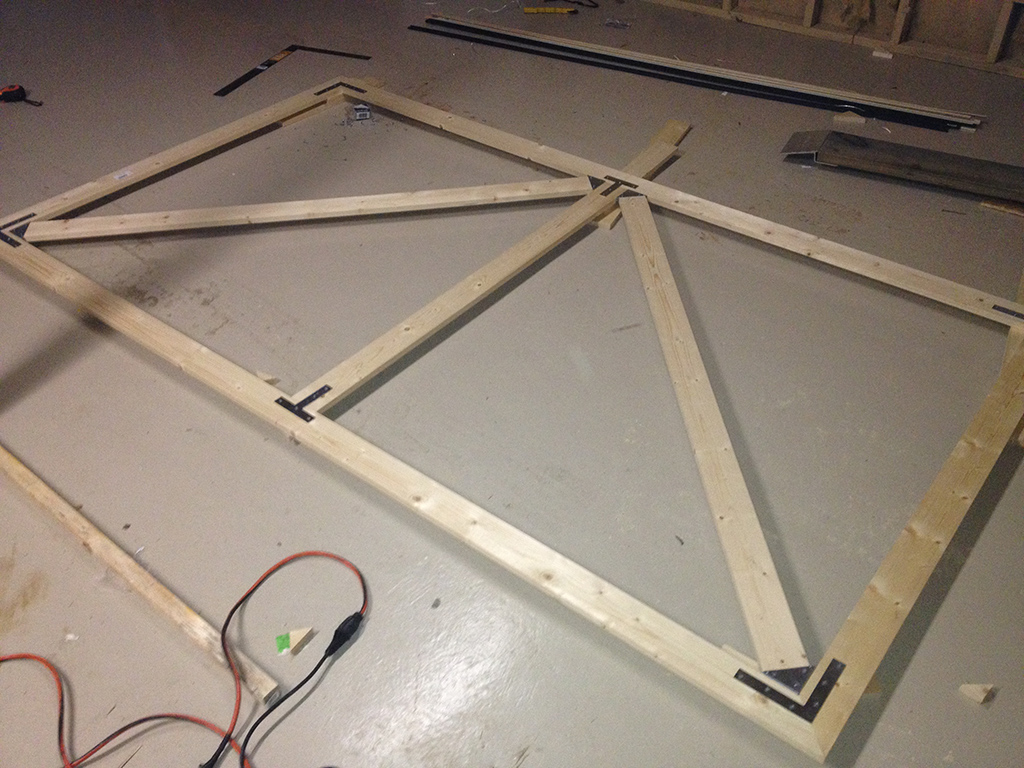
And when flipped over you can see the hardware I installed in an attempt to add some strength in the frame besides the wood.
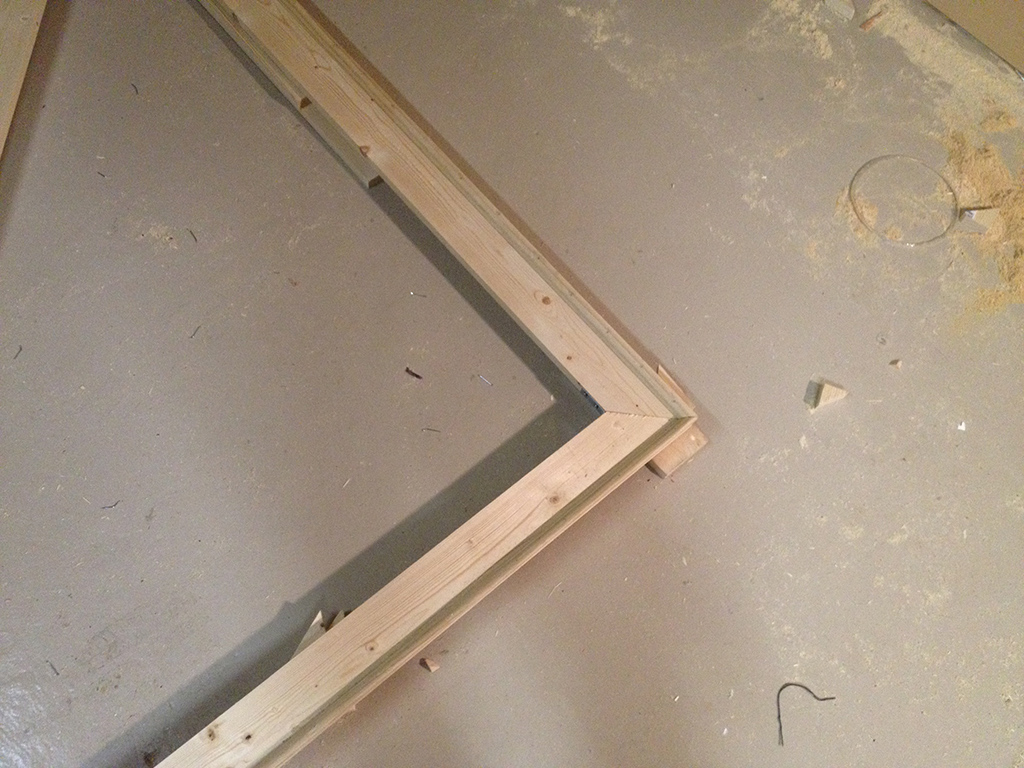
This corner shot (also seen in the first image) shows the quarter round which allows the spandex screen material to float in front of the frame and hide any warping or imperfection from being shown through in the stretched material.
Finally, I painted the frame black so that any light that bled through the spandex would not shine back through the screen and impact the image. This would match the wall the screen hangs on.
What I no longer have images for documents the process I went through to stretch the spandex material over the frame and secure it. I thought it would be nice to be able to easily replace the screen material one day and opted for a porch screening system over staples. In retrospect I would probably just do staples if I were to build again. Too much hassle with the porch screening channels as it was already pretty easy to stretch and manage.
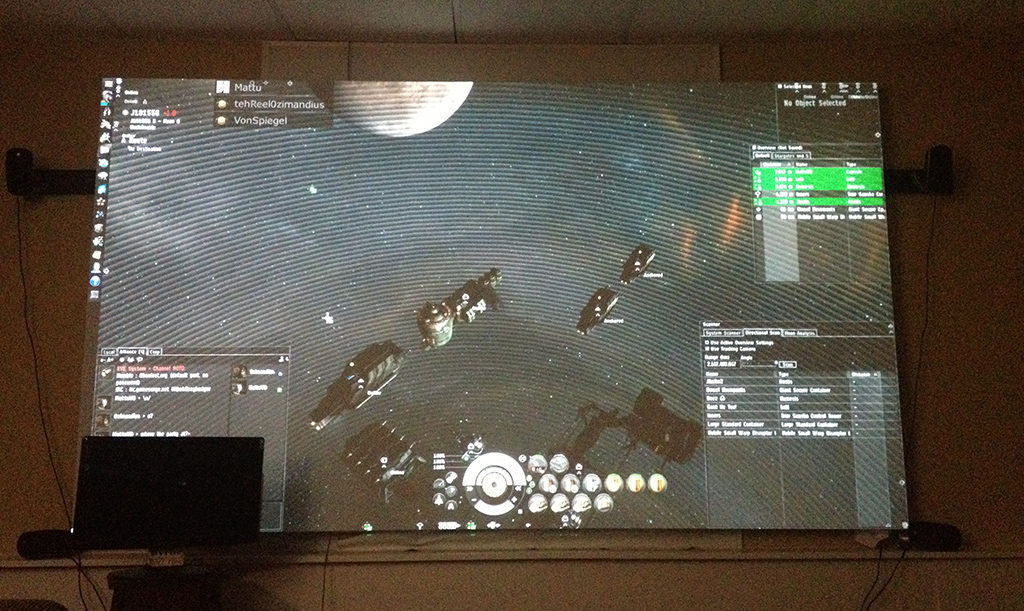
Finally I mounted the screen on the wall with a french cleat which you can sort of see in the final product image (Black 1x4s coming out of side of screen). The top was cleated while the bottom just had spacers to keep the screen even. Blackout cloth was used on the double window behind the screen and it was all eventually painted black with the wall.
Final Product
Picture quality aside, below shows the mounted frame with the projector connected to my computer and playing EVE Online. There is also a 21" monitor in the bottom left corner for scale. With the wall behind painted black and the lights in the room off it makes the image seem like it is floating in space.
I hope to have some more posts of past projects up in the coming weeks as well as some documentation of newer projects as well. Thanks for reading.