Raspberry Pi Laptop: Version 1
Somewhere around four years ago I had an unfortunate accident with my old HP 510 laptop which resulted in a thumb going through the LCD screen. This left me without a laptop, which was not too bad as I still had a perfectly fine desktop and an iPad. The only problem with this setup is that the desktop isn’t really portable and the iPad leaves a little to be desired in applications and multitasking. I did try sporadically for a while to get by with the iPad alone, following in the footsteps of people like Mark O’Connor, but it really just didn’t work well for me.
I had it in my head for a while during this time to try to do something interesting with the Raspberry Pi as all I had previously done was make it into another media center. I thought a laptop built around it would be great, but really didn’t find any good and cheap ways to achieve it. That was until I found the Lapdock series of netbook-like devices normally powered by smartphones. The lucky part to me is that the lapdock was a commercial flop leaving a lot of stock in the secondary market for cheap. I found a couple examples of people successfully using them with the RPi and figured, why not. I started doing some research and built the parts list for my own build.
Parts
- Lapdock 100
- Raspberry Pi Model B
- Micro-USB Female to Male extender
- Micro-USB Male to USB Male cable
- Micro-HDMI male to HDMI Male cable
- Micro-HDMI Female to Female coupler
- (Bought Later) USB Male to USB Male coupler
Initial Build
With all the parts having arrived I got right down to building as quickly as I could because I am impatient. First things first, I tested to see if the lapdock even worked. It was rather easy as all it took was the HDMI coupler and Micro-HDMI to HDMI cable to get the video working and plugging rPi into a wall-wart power source. After a few attempts at order of operations on what to connect I had it working. Next was to work on my power and data cable.
The first iteration of the power/data cable was made using the Micro-USB Female to Male extender and a spare charger cable designed for a phone. I split the extender cable at the male end and the charger cable in half. On the extender half of the cable, I stripped around 1 inch away from the shielding and stripped the individual USB wires bare at about 1/4 - 1/2 an inch. I did the same for the Micro-HDMI male end of the charger cable but only to the power and ground wires (Red and Black). On the regular USB male end of the charger cable I stripped back only the data wires (Green and White). Now, I simply soldered the exposed color coded wires on the extender to their counterparts on the two ends of the charger cable. The final wire allowed me to splt the data lines to the USB port of the rPi and the power lines to the normal power input of the rPi.
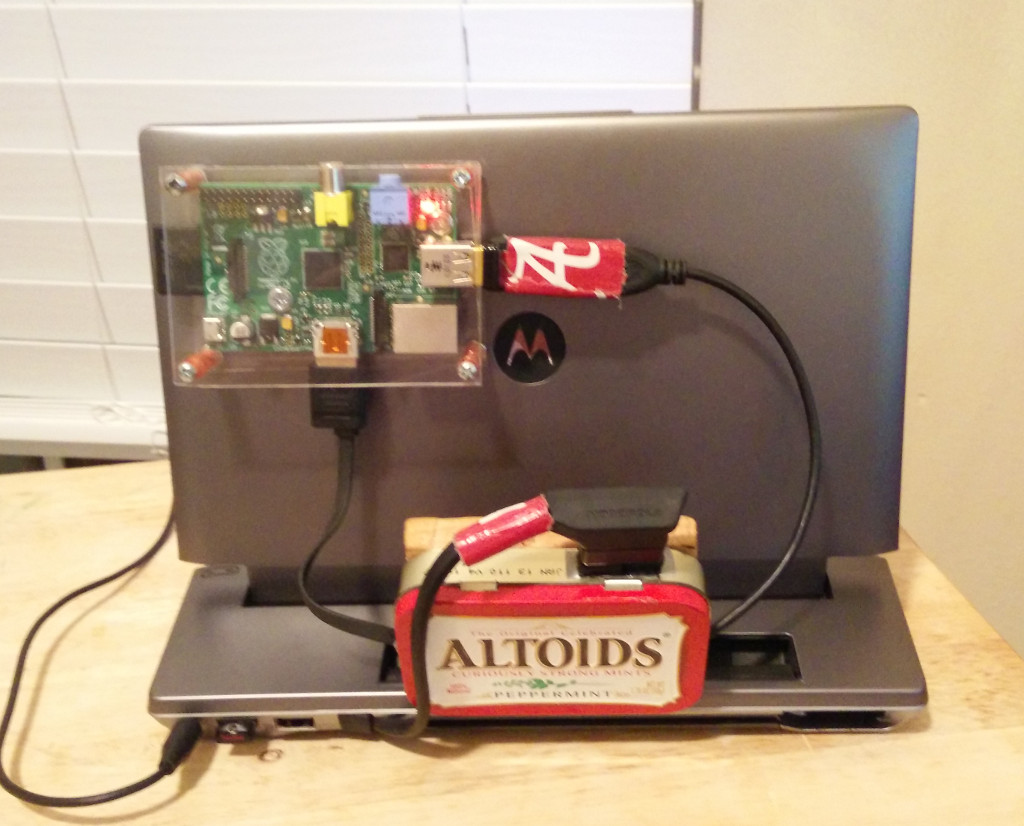
Now to contain all the wires since I left them long I used an altoids tin and a little bit of scrap wood from the shop. By screwing the altoids tin to the thin block of wood it allowed me to have it be able to stow in the phone slot of the lapdock. A little bit of velcro and a pressure fit case for the Raspberry Pi and I had it attached to the back of the Lapdock. Everything came together fairly nicely.
Testing and Tweaking
Initial testing showed no audio, which was what many other earlier creators of Raspberry Pi Lapdocks found. The solution was simple enough, just a flipped setting in the RPi’s configuration file: /boot/config.txt. Simply find the line for hdmi_drive and set it to two as seen below. This tells the Raspberry pi to force HDMI mode on the HDMI port as opposed to audioless DVI mode.
| |
I also experienced an issue where the keyboard and trackpad would intermittently disconnect/reconnect. Light debugging left me to believe it was due to my soldering skills (or lack there of) and the special cable I created. After a little research I discovered the Raspberry Pi B allowed for back-powering through the USB ports. Knowing this, I found the USB Male to USB Male coupler I mentioned in the materials list and did a straight connection from the Lapdock to the Raspberry Pi. This solved all connectivity issues I was having.
Impressions
After getting all the hardware together it, the setup worked about as well as I think I could have expected for the Raspberry Pi. I did end up overclocking the RPi to eek out as much performance as I could, but at the end of the day it is still a Raspberry Pi and has its limitations. Finding a web browser that worked well was the biggest issue. I ended up getting in as early as I could on the Collabora Web webkit based browser and it worked the best out of any I could find. Still had to use a script to pull youtube videos, but hey, it covered most of my needs.
Soon, hopefully, I will have another post up with my rebuild of the laptop with the Raspberry Pi 2 and my impressions of it.